I’ll walk you through how to create a restaurant website, from signing up for a website builder and editing your website to setting up your menu and online ordering form and advertising. Restaurant websites help your company rank higher on Google so that you appear at the top of searches in your area and reach a broader audience. And in nine steps, building a restaurant website will get you off the ground and back to the work you love.
Key Takeaways:
- Have high-quality images, updated information, and search engine optimization (SEO), which are key to a professional, high-ranking site.
- Make your website simple and easy to navigate.
- Add obvious, actionable “order now” buttons to every page.
Step 1: Choose & Sign Up for a Service
The simplest and least expensive way to start a website is by using one of the best website builders for restaurants. It gives you the framework for your website; you just need to customize it by adding your marketing photos and information.
UpMenu and Wix are two options that offer a free one-week trial for a restaurant website. These sites walk you through setup via YouTube videos and tutorials—you can do it yourself, without the need for a web developer. This lets you save on development fees but will take more work on your part. Essentially, the site development is free, but you will pay monthly fees to keep it up and running.
Throughout this guide, I will be using UpMenu to create a sample website. UpMenu charges $49 monthly for the basic plan, $89 monthly for the standard plan, and $169 monthly for the premium plan.
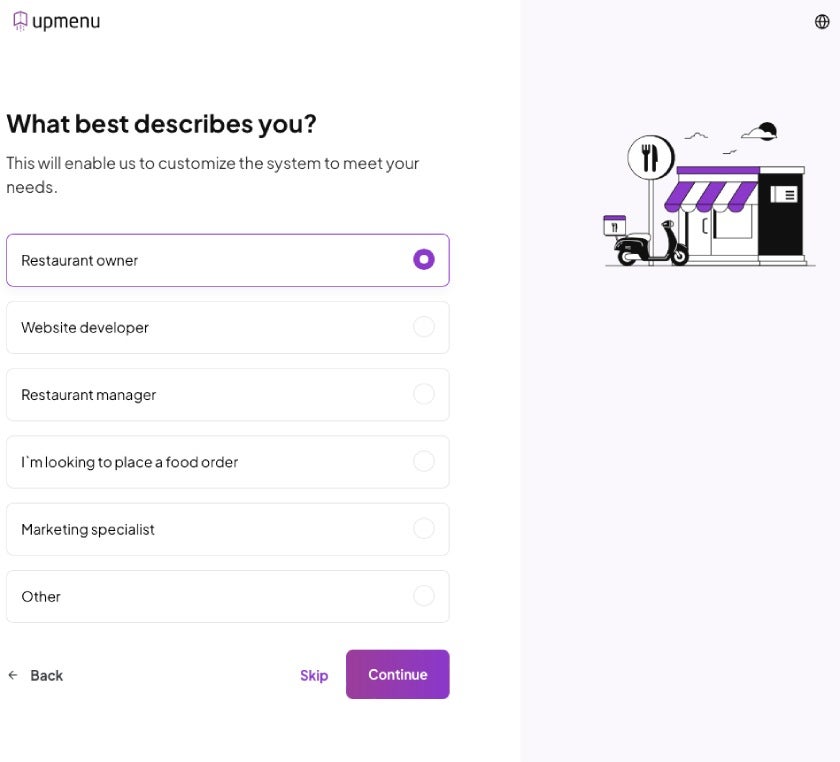
Register for a free account by adding your restaurant name, email, and phone number. Follow the prompts, and then the site will ask for your business name and role.
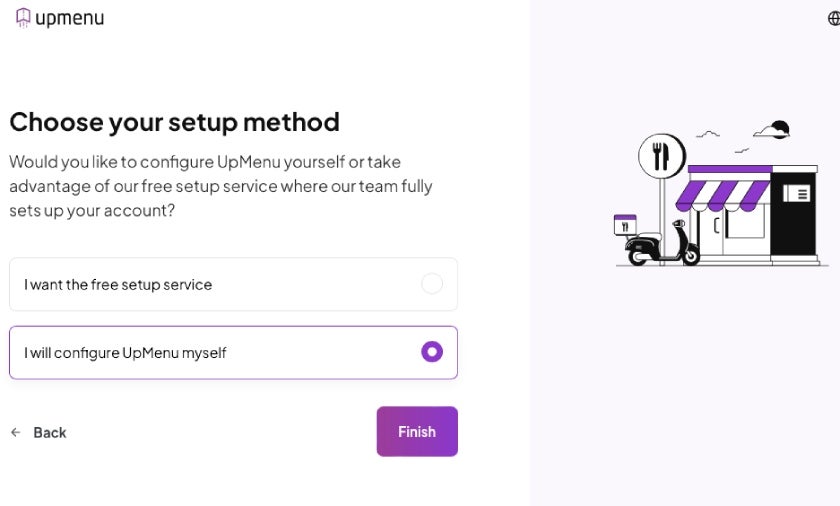
The free setup service is an option if you already have a website; the UpMenu team will transfer it over to its system and set up a mobile app, making it easier to enable online ordering.
If you’re starting from scratch and prefer the free option, choose to configure UpMenu yourself. There’s also a paid option starting at $699 for the UpMenu team to create the site for you.
Step 2: Pick a Template
The template you choose will determine the visual layout of your website. Ideally, your template should match your restaurant branding and be intuitive for customers to navigate.
Using UpMenu, hover over the left-hand menu and choose Website, then select Template on the pop-up box.
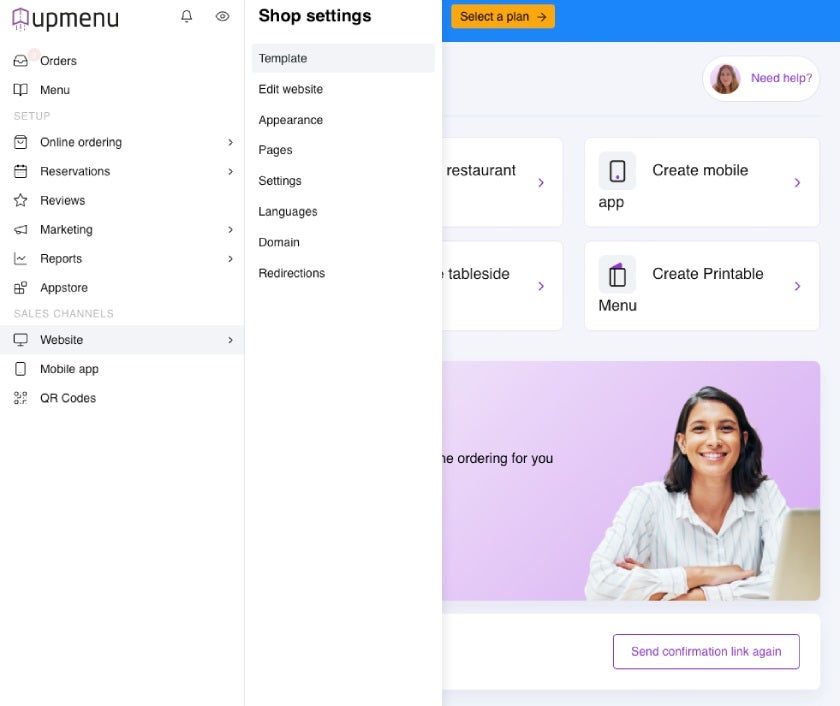
You’ll see 36 templates to choose from for a variety of types of restaurants, themes, and vibes. Choose one that feels right for the style that you’re going for—casual, dark and moody, quick bite, or colorful and fun. Don’t get hung up on the photos or colors as you’ll be changing them with your own marketing pictures.
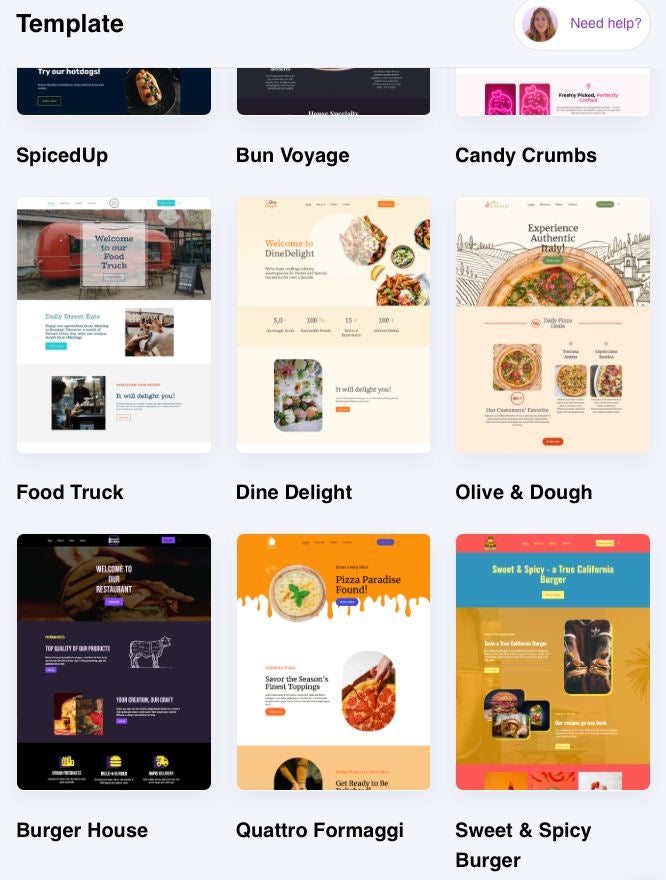
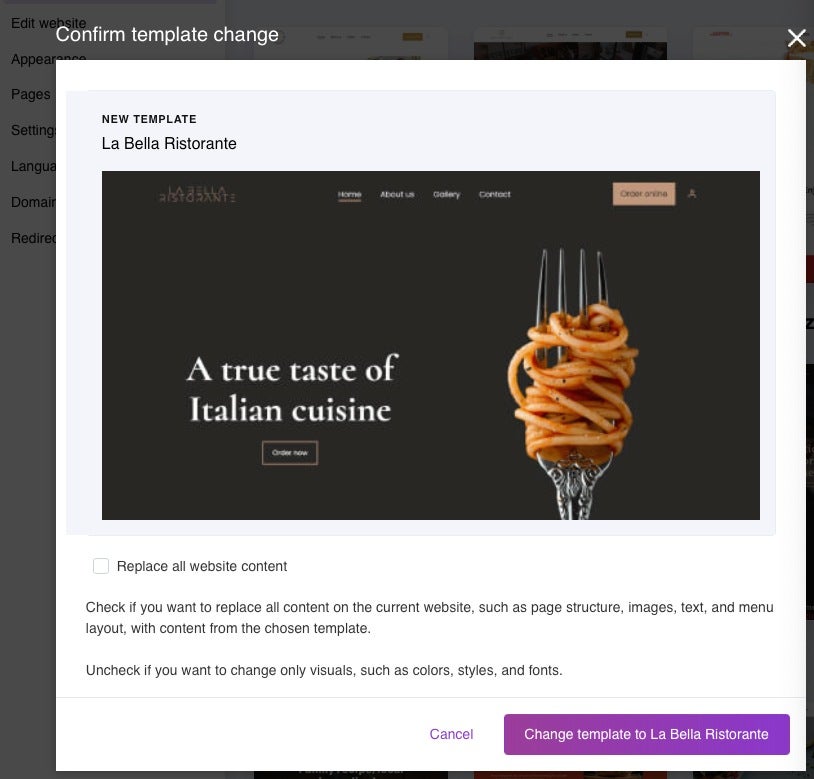
You’ll have the option to change all website content or keep it simple with just fonts and aesthetics.
Step 3: Edit Your New Site
Now you’re entering the creative side of your new site. This is where you will choose your color scheme and add personality. Think about the mood you’d like to create: Do you focus on family dining with bright colors and a laid-back atmosphere? Or a dark, elegant wine bar with a piano player, crystal rocks, and martini glasses? Evoke your restaurant’s vibe through your use of colors, backgrounds, fonts, and photos.
Go into the Website tab on the left side of your screen, and click on Appearance. You can change your font type and size and screen colors.
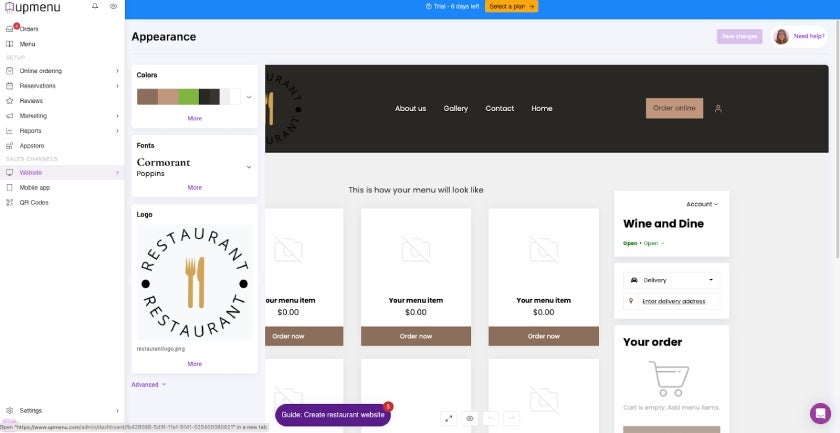
You can upload your logo to your new site photo gallery and add it to the logo box on each page. Click on the Logo square to open the photo gallery. You may use the drag-and-drop feature or upload from your computer to add your logo and other photos to the gallery.
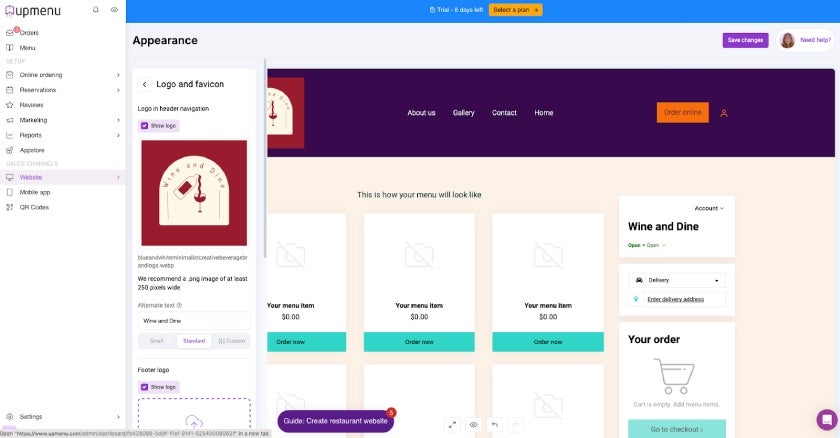
Scroll down and click on the Advanced options on the left-hand side for more choices on button shapes, animation, background, headers, footers, and navigation. You can play around with it until you find your favorite look. You can always go back and change it later.
Step 4: Add Content
Restaurant content will mostly be about your menu, events, and deals. For example, an entertaining description about the popular live music event at your brewery with games on the lawn and $5 microbrews or a promo plug about kids eating free on Mondays. Add more information about your restaurant, such as contact details, and spice up your menu descriptions.
If you’d like to start over with your template, you can delete all of the sample blocks and add everything fresh. Change the header and footer blocks as you like, adding your logo and contact information to every page. Or, you can use the boxes already given with the template setup and edit the boxes already created for you.
Go into the Edit Website page and click on the blocks you’d like to change. Use your creativity with the content. Edit the text and photos on the template and play around with the alignment and font.
Add photos from your gallery to the background. Changing the transparency to lower than 100% puts images in the background behind your text. Type in and customize your text into the heading boxes. Click on the blue + square to add an online order button to the page.
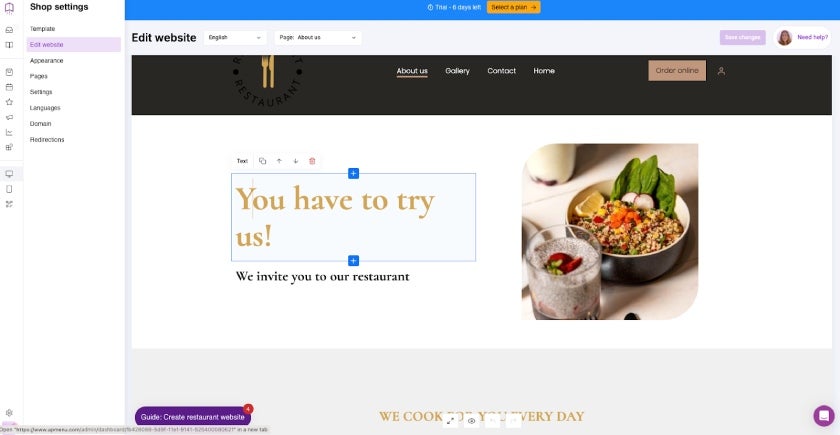
You’ll see an Add a Block button throughout each page. When clicked on, you’ll be given the option to add sections throughout your pages with space for up to four pictures in the arrangement shown below.
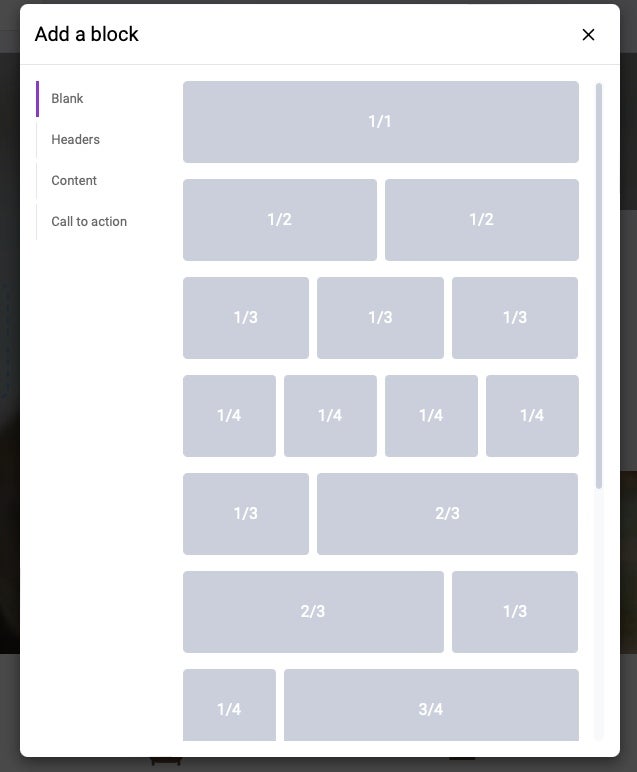
Add pictures from your gallery. When you pick one of the above configurations, you’ll be given another box with blue + icons. When clicked on, you’ll see the box below.
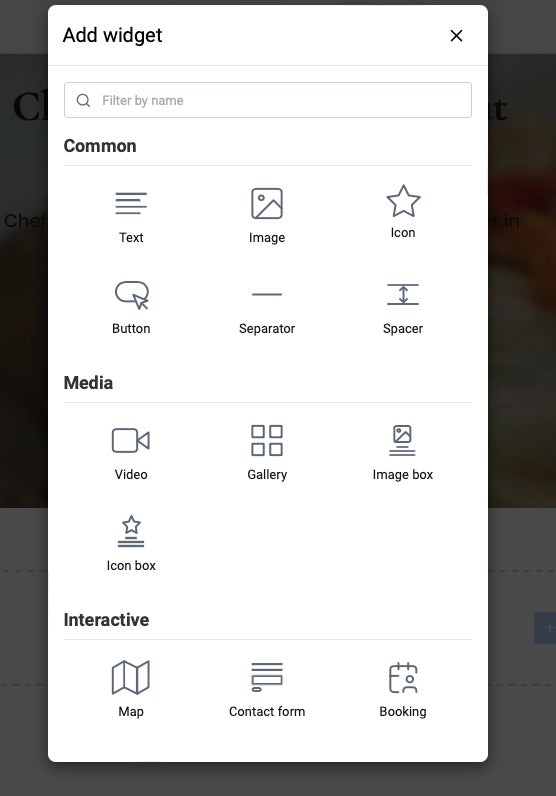
Choose any of the widgets to add to your page and fill in as desired.
The About Page is your chance to tell what makes your restaurant stand out. In our day and age, this page is very popular. Modern guests love to hear a backstory from small businesses. They like to know who is behind it, where the ideas came from, and what brings the restaurant to their city. Tell your backstory and anything that makes you unique. If you like to use company profits and volunteer time to donate to the humane society or any other cause, here’s your place to put it.

Step 5: Set Up Your Menu & Online Ordering Pages
The most important page is your menu—ensure it stays up to date with prices. Leaving prices off your menu deters a large part of the market and leaves customers feeling frustrated.
Using UpMenu’s online order page, you can add a background and change the colors, banners, and shapes of the online ordering buttons. Add food photos, menu prices, and items with descriptions. Ensure each menu item corresponds with an image in the order box to avoid confusion. Remember, this page is not a static menu—it’s an ordering platform.
On the left side of the screen, use the tabs to customize your site for payment, orders, fees, and printing receipts.
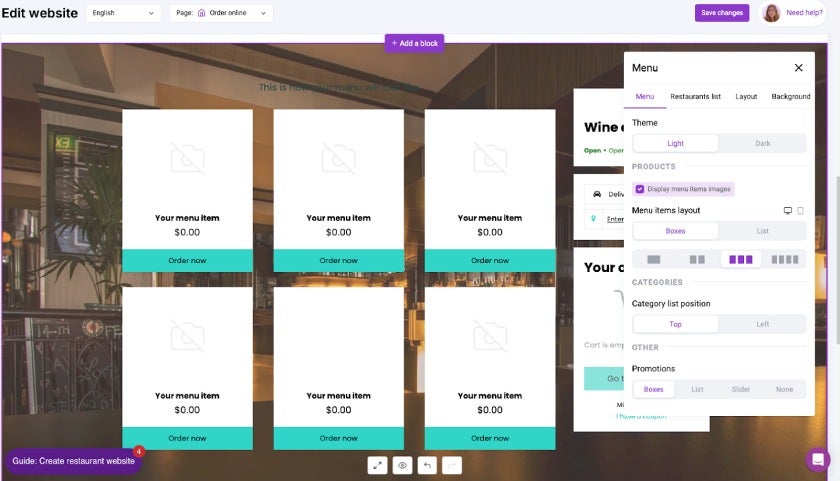
Creating a printable menu is a good option for businesses to pass around the office for lunch orders and less computer-savvy patrons who prefer paper copies.
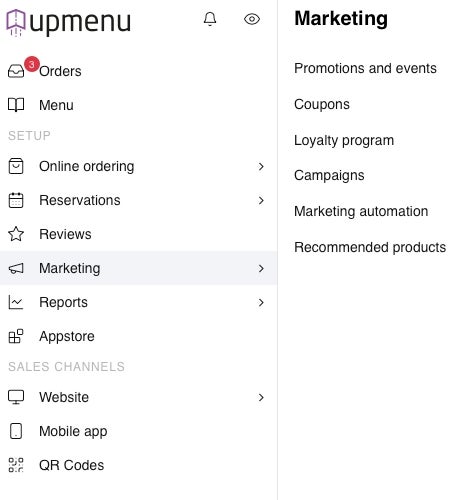
You can also add deals, coupons, promotions, and automated marketing campaigns to send specials to your customer email list.
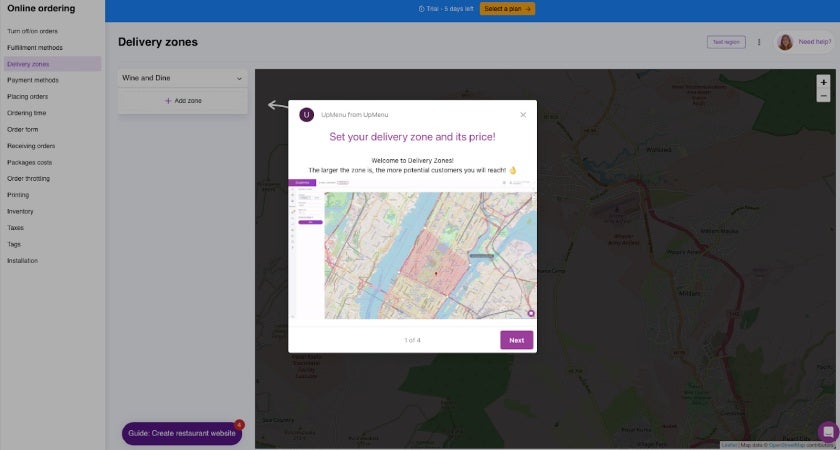
If your restaurant offers delivery, change your zone map to show your delivery prices and the area that you serve.
Step 6: Create a Contact Page
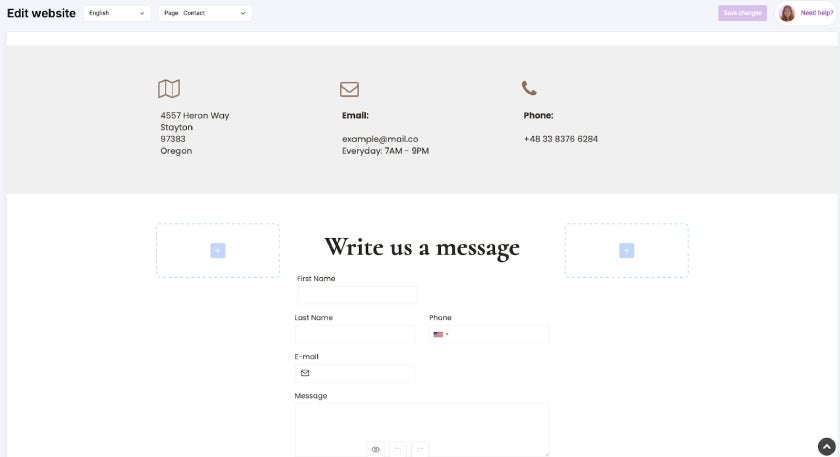
The Contact page is one of the most important. Here, you’ll put in your physical address, phone number, updated hours of operation, and a message box. This is where most customers will find you. If your hours change, this will be the first place to change them. Nothing makes customers more unhappy than to show up and find your shop closed because of outdated business hours listed on the site.
Step 7: Optimize Your Site for SEO
Make sure to optimize each individual page for SEO. This helps these pages rank higher in searches and bring more people into your store.
Continuing with UpMenu, navigate to the left side of your screen, and under Edit Website, choose the page you’d like to edit. Click on the three dots to the right of the check mark. Next, click on settings in the pop-up box. Another box will appear to the right—click the arrow next to Advanced and SEO.
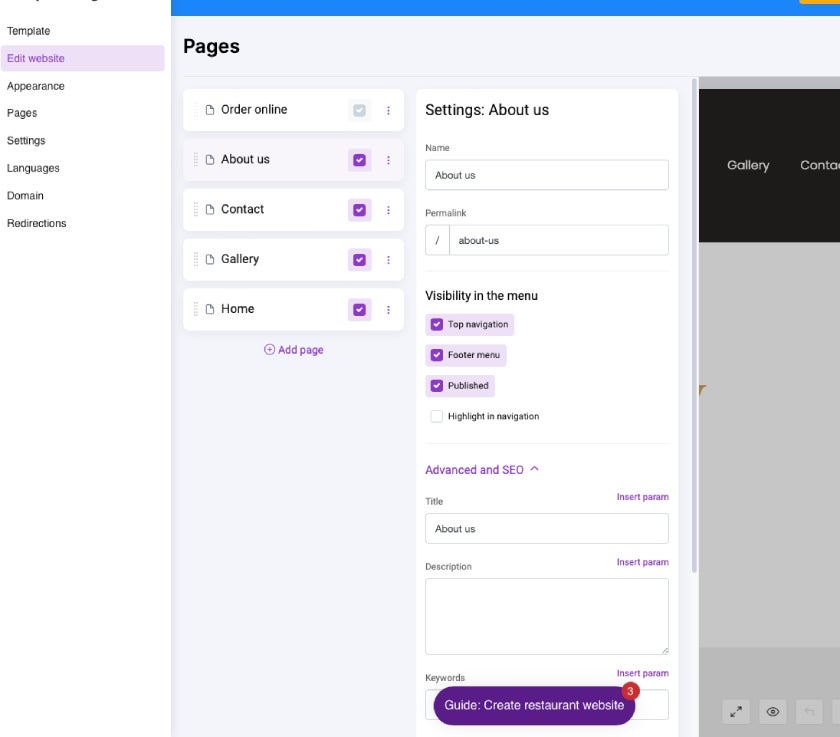
In the blank spaces, add descriptions and titles with SEO tools utilizing keywords that are likely to be used in online searches and search engine results pages (SERPs). If SEO is new to you, research on this subject is highly recommended. Using the right search terms is important in your content and throughout the SEO boxes in order to rank in Google.
Step 8: Create a Website Domain
The domain name is the name of your site—for example, “restauranthq.com.” It’s what the customer will type into the address box to route to your site or what will pop up on Google when your restaurant name is searched.
The last step before going live is to click on the Domain option in the Shop settings area. You’ll have the option to use a free domain or a custom one. Try to use one with your restaurant name, if it’s available, or something short and easy to remember that relates to your business.
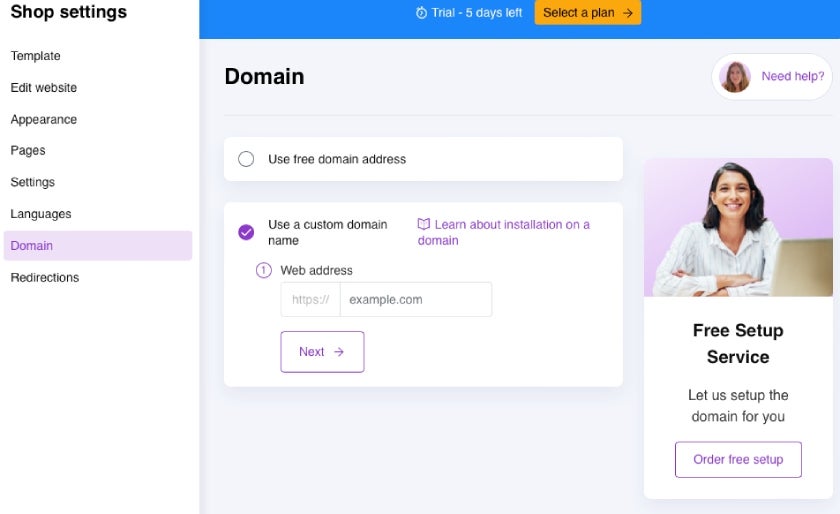
If you have one already, connect your domain to the new site under I want to use my own domain.
Or, you can also buy a domain. The prices are around $3 to $14 per month, with many sites offering the first year for free. Bluehost, Domain.com, and GoDaddy are popular options. Shop around and find a domain seller and price that you like. Go onto your domain hosting site and buy the domain, then come back to connect your new domain name to your website.
Once you’re ready to start receiving orders, insert your new domain name into the Shop settings section.
Step 9: Advertise!
Your website is ready to go! Now, all you need is customers. Start promoting through social media, tell your regulars, add it to your restaurant Google search, and print up some business cards. Ensure your site shows up properly on Android phones, iPhones, tablets, computers, etc.
Announce your site over email marketing, highlighting new menu items, promotions, and any other new aspects of your business. Think about running ads on social media. TikTok ads have shown to have a large payoff in sales and revenue. Hire a social media manager to blast all of your social media sites with your beautiful new site.
What Customers Look for on Restaurant Websites According to Reddit Users
We researched on Reddit to hear what actual users are looking for and angry about, on restaurant websites. Feedback is integral to reaching an audience and building a quality website. When people don’t find what they’re looking for, they get frustrated and jump to a competitor.
Reddit users asked for restaurant sites to:
- Post a separate updated menu page with current prices—not just order forms. Customers don’t want to get rerouted to Grubhub or Yelp for uploaded, low-quality smartphone photos taken by other customers. The pictures are usually blurry and often outdated.
One user said the restaurant experience starts before you go there. Modern customers have clear expectations of quality and professional businesses, and this is no different for the food service industry.
- Have a website; Facebook and Instagram are not websites. Social media is considered unprofessional to older audiences, and they don’t have the pages and high-quality menu descriptions that they are looking for.
- Take down old versions of the menu. Users have a lot to say about frustrations with items that they were expecting but are no longer available and outdated prices. A big problem is third-party sites and Facebook postings. If you have a social media management company, ask if they can keep photos updated and delete old information from all sites including third-party sites. This task can be daunting to restaurant owners who don’t always have control over what is posted about their restaurants.
FAQs
Last Bite
Creating a restaurant website is easier than it appears and relatively inexpensive. Web builders walk you through the process and make it possible for website novices to create their own sites. The most important thing is to use high-quality, professional photos, create a simple navigation experience, and use updated menu prices. With just a few important pages, you can have a restaurant website up and running in a few days.
ALSO READ


