


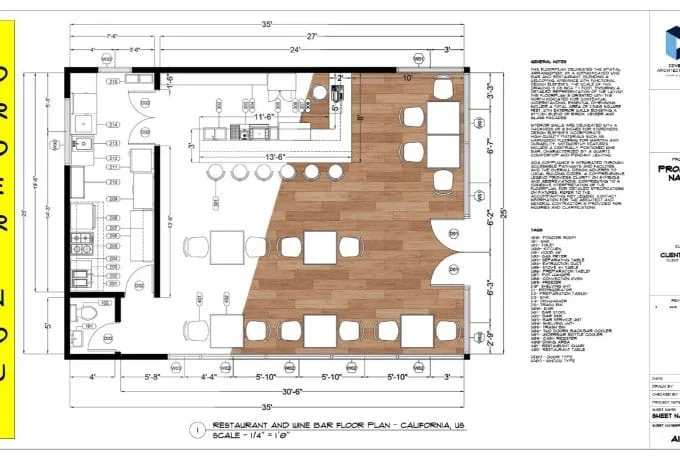
A restaurant floor plan typically consists of a sketch or bare-bones layout of your restaurant space, including the dining area, kitchen, storage, bathrooms, and entrances. The best restaurant floor plans support operational workflows while communicating your brand to customers and reinforcing your concept.
Your specific restaurant layout will depend on your restaurant type, but a 40/60 split between the kitchen and dining room is industry standard. Designing even a simple restaurant kitchen layout, let alone a large, full-service establishment, will ensure both your staff and guests are accounted for.
The best restaurant floor plans provide space for efficient operations while enhancing the overall experience for every diner. Let’s discuss how to achieve this goal and the critical steps to ensure your restaurant floor plan design leads to success both financially and in customer experience.
Free restaurant floor plan templates from Toast
Toast’s restaurant floor plan templates can help you get inspired as you map or reimagine your restaurant’s layout. Visualize how employees and guests will move through the space, and learn how technology has become integral to the restaurant floor plan today.
Visit Toast
- Step 1: Understand your location, permits, and ADA
- Step 2: List your restaurant’s functional spaces
- Step 3: Plot out your kitchen layout
- Step 4: Plan your dining room layout
- Step 5: Design traffic flow for guests, staff, and deliveries
- Step 6: Add bars and service counters
- Step 7: Designate break and staff areas
- Step 8: Add your back office
- Restaurant floor plan consideration checklist
- 4 common floor plan mistakes in small restaurant layout plans
- Restaurant concept layout recommendations
- Restaurant layout frequently asked questions
- Last bite
Step 1: Understand your location, permits, and ADA
Before you get your heart set on a particular restaurant layout, you’ll want to do some housekeeping, especially if you’re planning to make any cosmetic or structural changes to your space.
Use your building’s blueprints to identify existing electrical lines, water lines, load-bearing walls, and areas where you can place floor drains. After that, contact your landlord and local zoning board to learn about any restrictions that could impact your choices. Your landlord, for example, may have rules about where you can receive deliveries and which way entrances and exits can face. Zoning is primarily a concern for exterior signage and concepts that want to add drive-thru service.
Local ordinances may not permit drive-thrus, or you may need special permits and licenses for restaurants for sidewalk seating and outdoor patios. Zoning ordinances also determine where you can vent kitchen fumes and smoke.
Finally, familiarize yourself with the Americans with Disabilities Act (ADA) requirements for restaurants. Accessibility and universal design are huge for every type of restaurant, as they decide everything from the width of your doorframes (at least 3 feet) to the height of your tables (between 28 and 34 inches above the floor), restroom sizes, furniture selection, and parking accommodations.
Restaurants are considered public accommodations under the ADA. This means entrances, dining rooms, restrooms, and other service areas should be accessible to guests with disabilities. Requirements will vary based on the building and scope of renovations, so consulting local authorities and consulting ADA guidelines is key before finalizing your design.
Step 2: List your restaurant’s functional spaces
Every restaurant has several operational spaces for storing and preparing food, selling products, and sanitizing preparation and serving equipment. The size of each area will vary based on your restaurant’s style and whether customers eat on-site or take food to go.
But the primary operational areas of the restaurant floor plan include entry and waiting areas, kitchens, and more. Functional spaces are key, as even the best groups, such as The Alinea Group, fall victim to closures when their dining rooms are not properly mapped out.
- Entry and waiting area: For quick-service restaurants (QSRs) and cafe concepts, this space can be minimal, especially if you have a bar for counter service. This space will hold waiting guests, so ensure it is built accordingly.
- Dining areas: Restaurant dining areas typically require 60% of the restaurant space to accommodate seating and traffic flow. If you use a point-of-sale (POS) system, you’ll need space for terminals throughout your dining room.
- Kitchen: In most restaurant floor plans, the kitchen takes up about 40% of the space. This might seem like a lot for a space that patrons never see, but it’s the heart of your business. Kitchens also need gas lines, water lines, electrical wiring, floor drains, and ventilation hoods.
- Restrooms: In most locations, health codes require restrooms for both your customers and your employees. These all typically need to be ADA-compliant.
- Delivery entrances and loading docks: In most locations, you don’t receive supplies through the same entrances that customers use. Large commercial buildings will already have loading docks or back entrances for vendor deliveries.
If your building doesn’t have one, it’s a good idea to add a delivery entrance to your restaurant. You don’t want customers walking around vegetable crates to get to a table! - Staff areas and back office: Restaurants need a back office to store sensitive business information, such as personnel files, tax documents, computing equipment, and cash reserves. Some cities also require employers to provide break areas for staff.
- Bar and service counters: A bar area is essential for restaurants with robust cocktail, coffee, or juice programs. If you allow customer seating at your bar, you’ll need to ensure that a portion of it is ADA-compliant, with counter space no higher than 36 inches and at least 36 inches wide with a 12-inch overhang.
Delis, sushi shops, and other quick-service restaurants also need counters or bar areas. The availability of floor drains, electrical lines, and water lines will usually determine where you can place your bar or service counter. - Takeout and delivery pick-up areas: If you do a lot of takeout and delivery business, you should set aside space to hold completed orders and enable efficient pick-up.
- Outdoor spaces: For some restaurants, the only outdoor space is the front entrance. But, in temperate climates, you’ll want to expand your dining space with outdoor patios or sidewalk seating.
As you make your list, I recommend you consider how many people need to work or dine in each area simultaneously and how long they will occupy the space. Allocate the most space in your floor plan to areas where the most people will congregate for the longest amount of time.
Dining rooms in full-service restaurants where customers spend two hours per meal will naturally be larger than those in a burger joint, where most customers take food to-go, and tables turn over faster.
Step 3: Plot out your kitchen layout
Your restaurant’s kitchen has the most significant technical needs of any area. That’s why you start with the kitchen. Most restaurants allocate 30% to 40% of their total space to the kitchen to provide adequate space for food prep, cooking, sanitizing, and service. But there’s more than just food to consider.
A restaurant kitchen must allow for adequate flow of:
- Raw ingredients going into the kitchen, and prepared food flowing out.
- Cooking and cleaning staff in an efficient workspace, and service staff in an efficient pick-up space.
- Waiters bring orders into the kitchen and pick them up when they’re ready.
- Cooking fumes, steam, and smoke are safely vented from the building, and wastewater and cooking grease are properly disposed of.
A restaurant kitchen is also a nerve center for all your utilities. To remain safe and sanitary, a restaurant kitchen needs:
- Gas lines to power cooking equipment.
- Electrical lines to power cooking and ventilation equipment, refrigerators, freezers, and POS equipment, such as printers and kitchen display systems (KDS).
- Water lines to supply dishwashers and sinks, specialty beverage equipment such as soft drink dispensers and espresso machines, and sprinkler or fire suppression systems.
- Floor drains for refrigerators, ice machines, ice bins, and sinks.
- Grease trap connections prevent cooking fats from entering the public wastewater and cooking equipment from entering the public wastewater.
Once you’ve chosen the best spot in your restaurant space to support your kitchen equipment, you’re ready to think about the layout of the kitchen itself.
Traditionally, there are three primary commercial kitchen designs for restaurants: assembly line, island, and zone. Some people also list the open kitchen. And each restaurant kitchen layout has benefits and drawbacks.
Get a professional restaurant floor plan from a Fiverr designer
You’ve likely been making notes and pen-and-paper illustrations as you’ve gone through the steps above. Now, it’s time to create an official copy of your restaurant floor plan. You can do this on your own with a free illustrator app like Canva or a specialized tool like SmartDraw.
However, if you’re courting investors or have a complex restaurant operation, consider hiring a professional to draft a physical copy of your restaurant floor plan. You can typically find graphic designers who specialize in restaurant floor plans on freelancer sites like Fiverr for rates ranging from $10 to $100, depending on your restaurant’s size and how quickly you need the floor plan.
Visit Fiverr
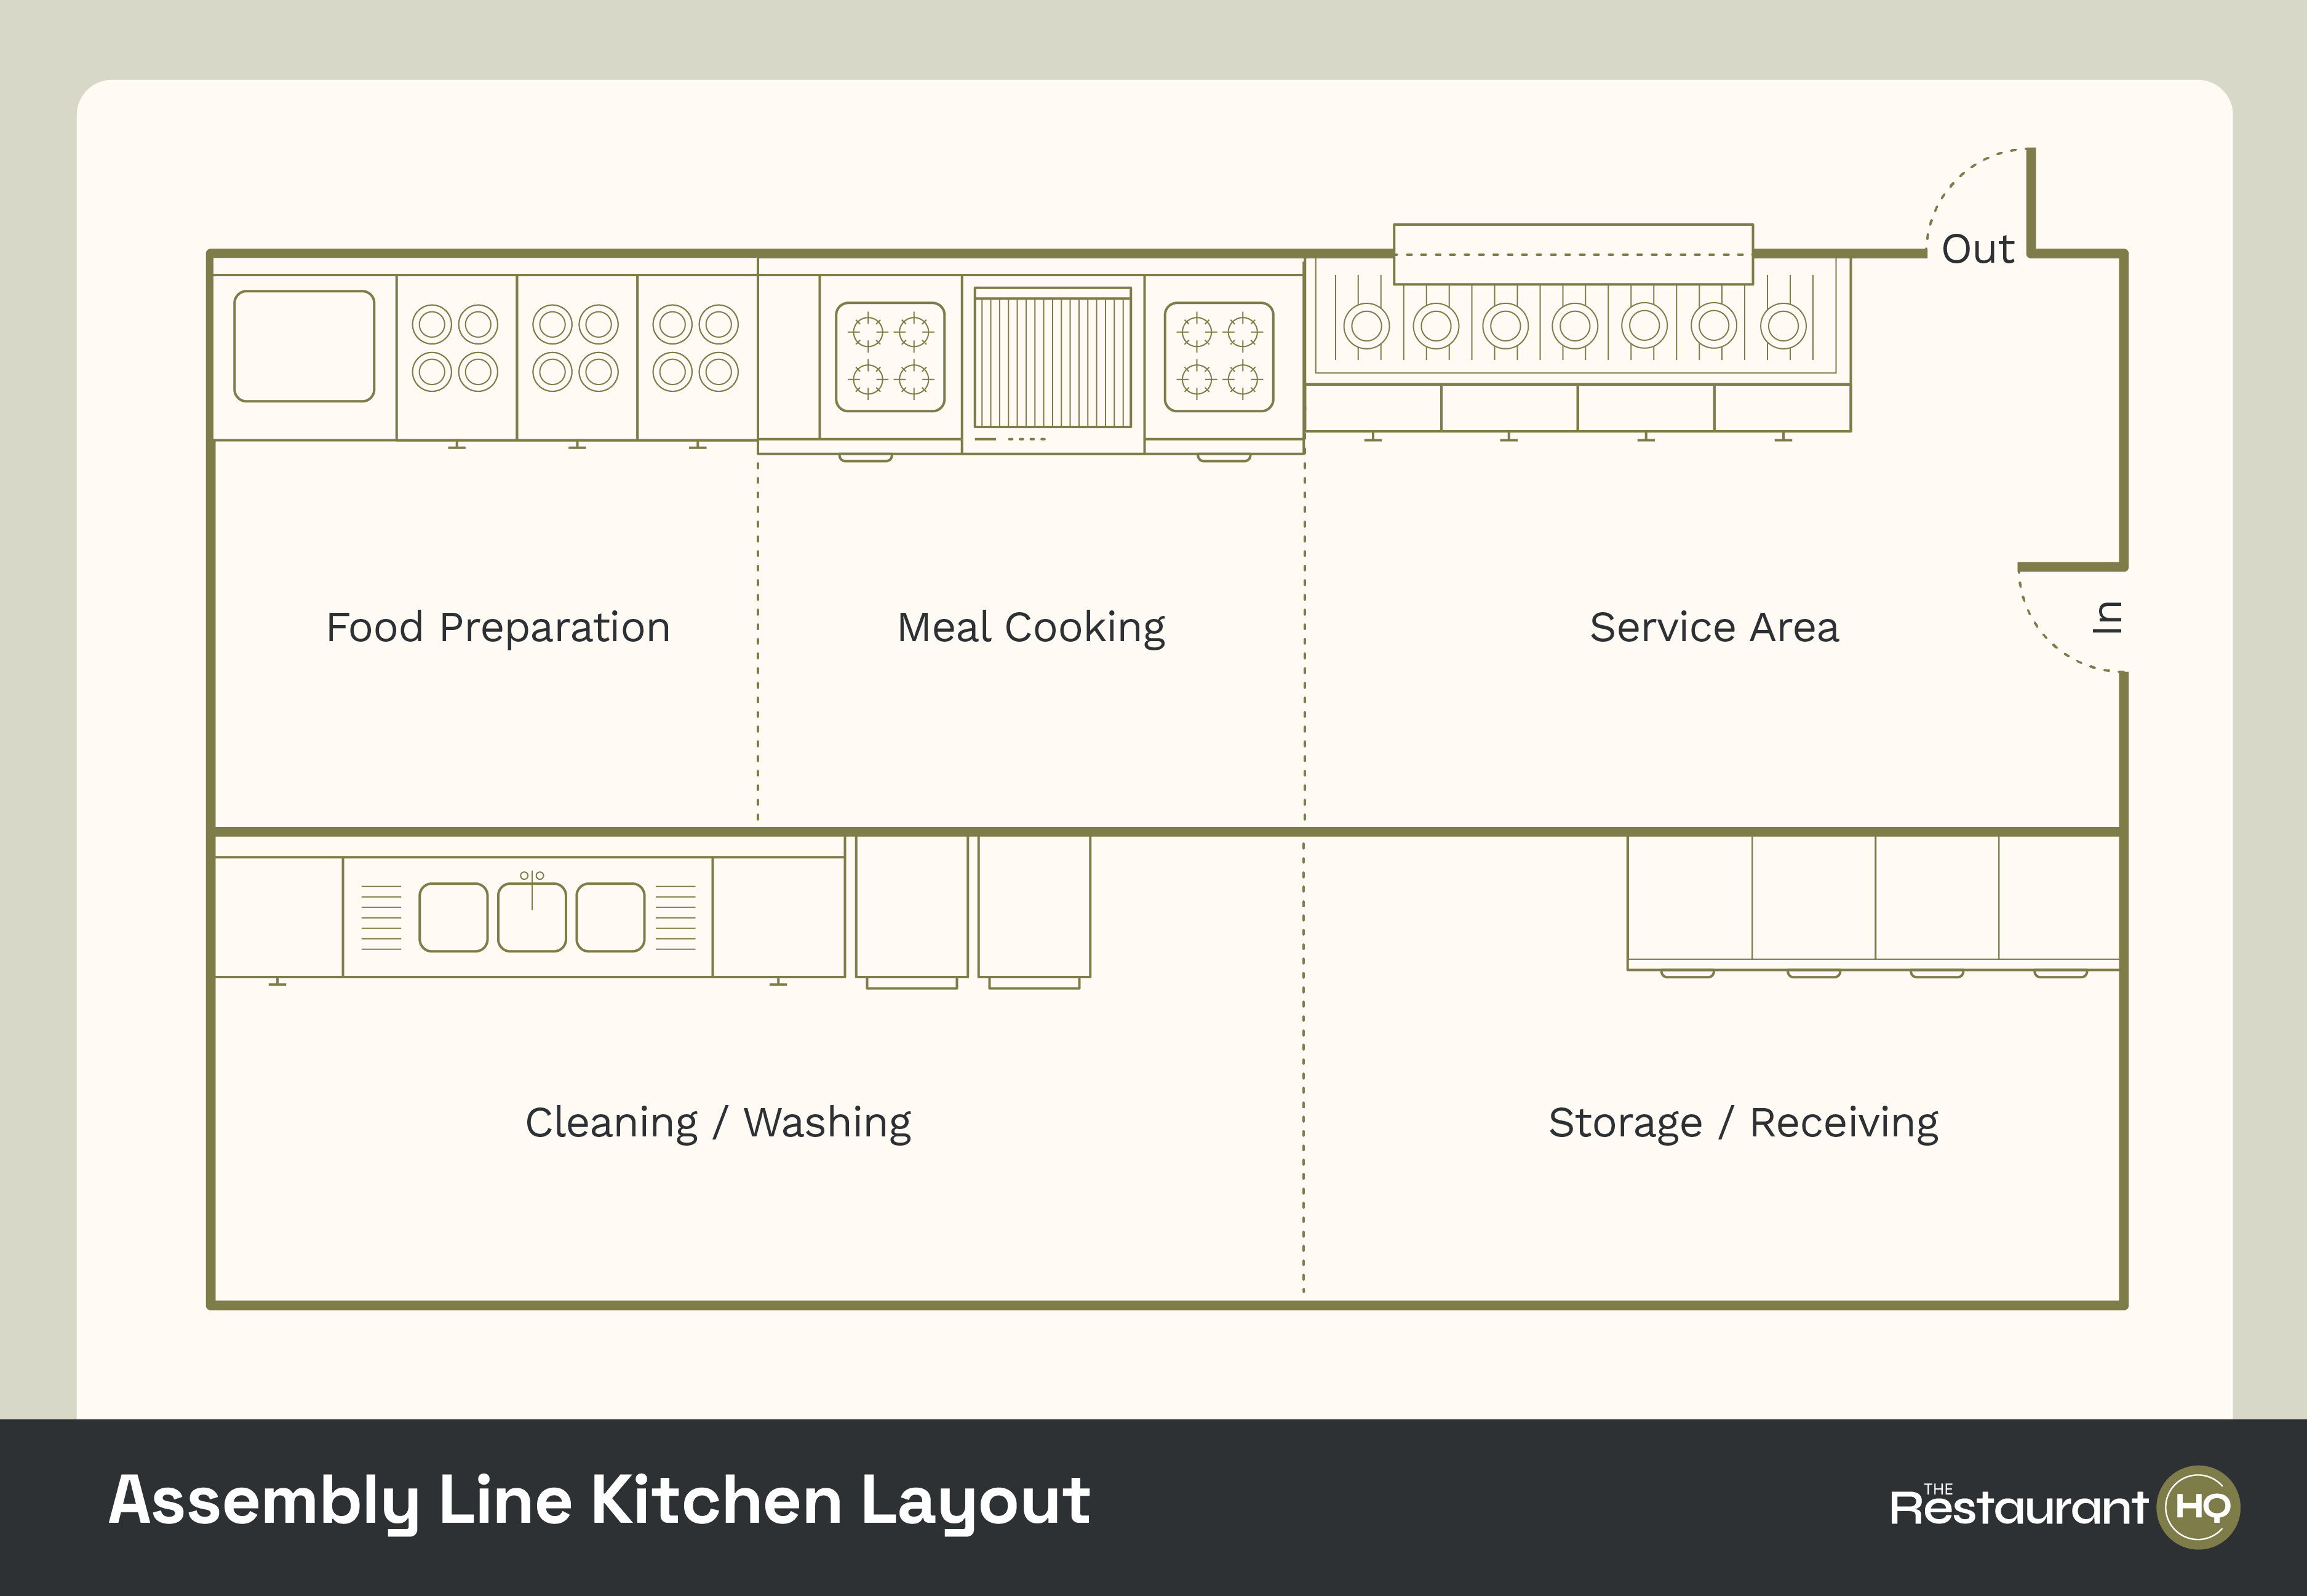
Assembly line kitchen layouts
This floor plan includes three distinct areas for food production, food prep, cooking, and service (i.e., plating and pick-up). An assembly line keeps staff in defined workspaces, so there’s little movement between stations. An assembly-line kitchen is best for high-volume, full-service pizza and institutional kitchens.
Island kitchen layouts
The circular layout of an island kitchen floor plan allows for greater movement and supervision of cooks between stations. The cooking equipment — ovens, grills, and fryers — is centralized, with other stations for storage, food prep, and washing placed around the perimeter.
It’s easy for a head chef to see all the kitchen stations at once in an island kitchen, making this layout a great choice for restaurants with a chef-owner and for kitchens with flexible staffing.

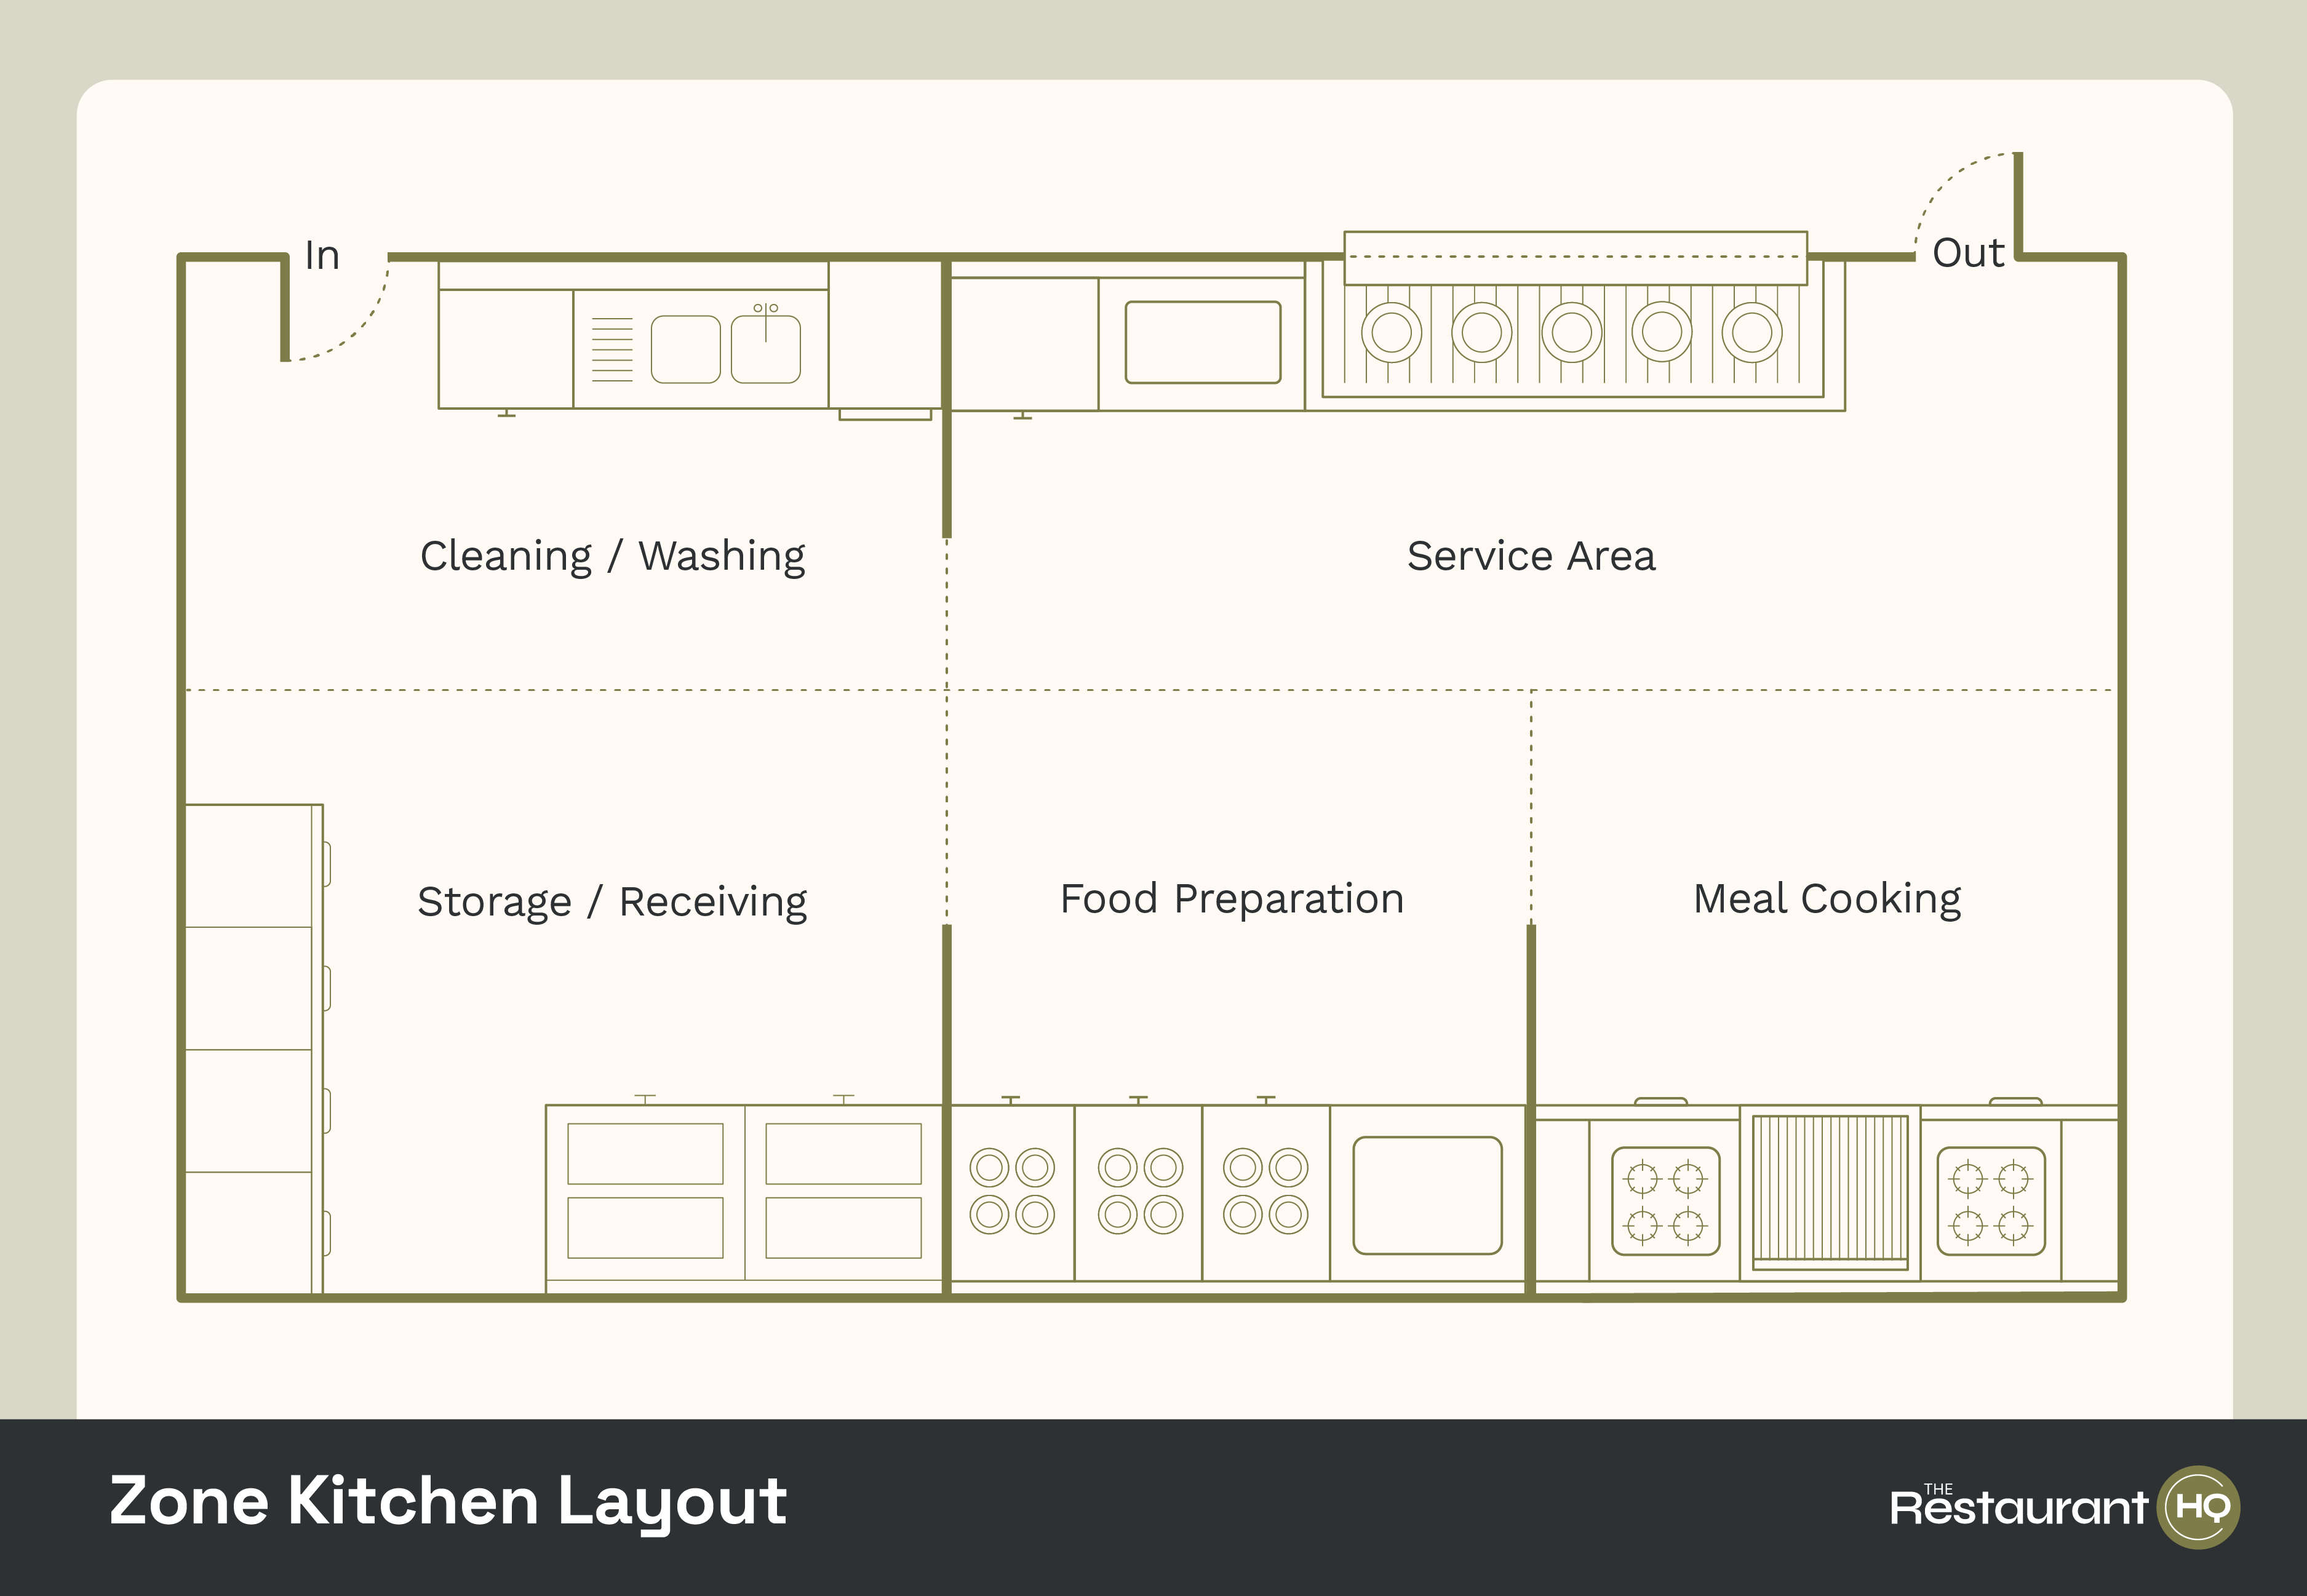
Zone kitchen layouts
A zone layout breaks your kitchen into roughly equal-sized squares for each task, from food storage to cooking. Defining zones for each kitchen task allows easier staff movement, giving front-of-house staff easy access to prep and cooking zones.
This setup is excellent for small spaces and food service operations, such as coffee shops, where the same staff prepares food and takes orders. Because the cooking area is small, it works well for restaurants that serve many cold dishes, such as salads and desserts, or other items that don’t require cooking.
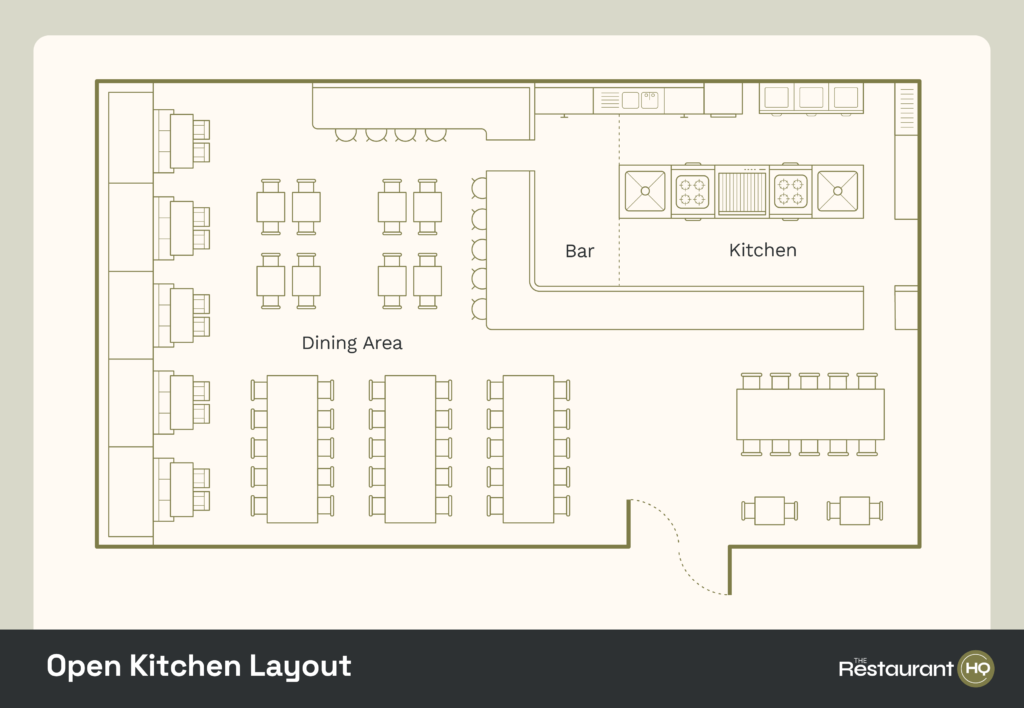
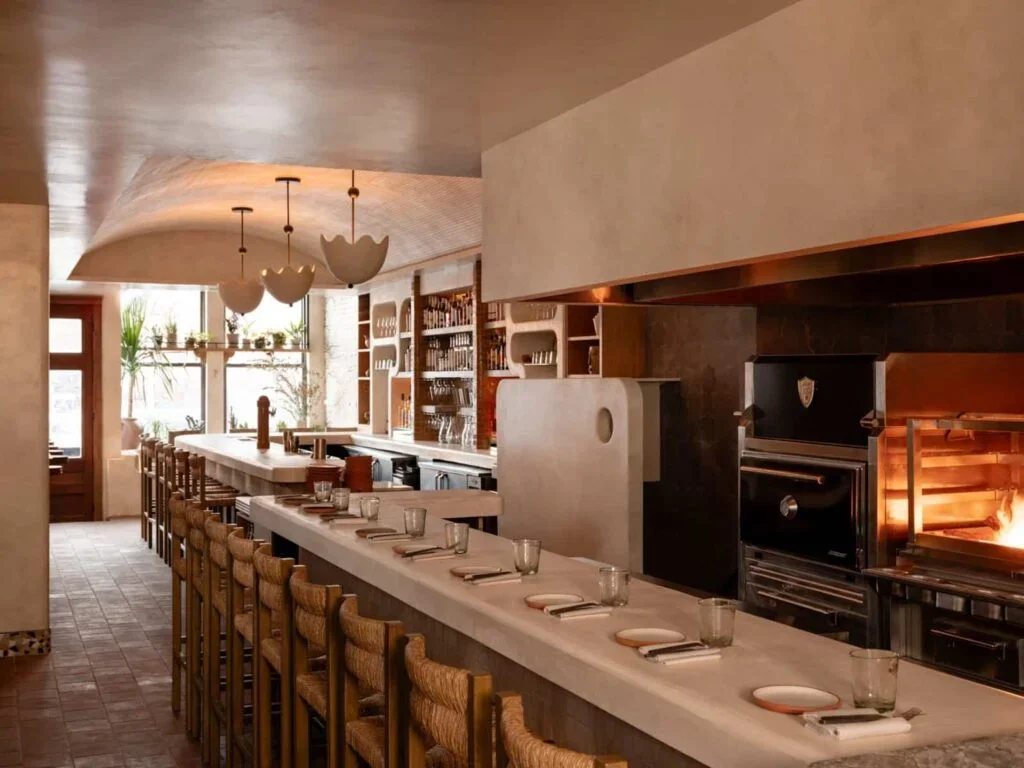
Open kitchen layouts
The only difference between an open kitchen and a traditional restaurant kitchen layout is the presence of walls separating customers from the kitchen. Open kitchens can be assembly-line, zone, or island layouts, depending on the available space, budget, and operational needs. But restaurateurs, beware: Choosing an open kitchen has a greater impact on your dining room layout than on your kitchen layout.
This is a popular configuration for pizza shops and delivery-heavy restaurants that want to infuse their services with a little more drama and flair (think rising flames, tossed dough, and passionate communication) while also ensuring ample space for line formation. Open kitchens are also popular among celebrity-chef concepts, establishments with exclusive chef’s tables, and high-end restaurants where customers expect a show.
Step 4: Plan your dining room layout
Restaurant dining areas use around 60% of your total restaurant space. What you put in this space (high-top tables, lounge sofas, traditional two- and four-top tables, etc.) depends on your restaurant type. The first step in this equation is determining how much space you need to support your expected customer levels.
Generally, fine dining restaurants need to allow more space per customer than fast-service or casual restaurants. But your location, restaurant size, and even your chefs can help you figure this out.
A menu-inspired dining room design keeps your concept in mind, seamlessly blending your cuisine into your space. When it comes to achieving menu-inspired design, your chefs are your secret weapons. Get them involved in the design process. If your most popular item is made tableside, they can help you ensure there’s space for tableside chefs to serve and entertain, and keep space for others to get around without disrupting one another.
Beyond that, follow the industry standard ratios for the square footage per customer:
- Fine dining restaurants need 18 to 20 square feet per person.
- Full-service casual restaurants need 15 to 18 square feet per person.
- Counter-service restaurants need 12 to 15 square feet per person.
You can start with your target customer count to determine how large you need to make your dining room, or go the other way and use the size of your available space to figure out how many customers you can likely serve simultaneously.
Suppose you’re operating in an existing space. In that case, you’ll likely also have a certificate of occupancy issued by the local fire marshal that tells you exactly how many people can be in your space at one time. This can be a great starting point for designing your dining room layout.
Once you know how many people you’re accommodating, you’ll want to consider how much individual space to allocate for individual seating. The following table and chair space allocations allow staff and customers to co-exist easily and provide room for most wheelchairs to pass.
- Occupied chairs: At bars, service, counters, and tables, there should be 18 to 20 inches of space between occupied chairs.
- Parallel tables: There should be 42 to 60 inches between the sides of tables that are parallel.
- Diagonal tables: Square tables set on a diagonal only need about 24 to 30 inches between table sides. Space saving is one reason this table configuration is so popular.
Of course, much of your space allocation for tables and chairs depends on your restaurant concept and the types of seating you use. Mixing table styles optimizes dining space by making clever use of wall space and supporting efficient traffic flow. You can move freestanding tables to accommodate large parties or change your space’s look and flow.
Booths maximize wall space, and mixing them in with tables gives patrons their choice of seating. Many dining concepts add counter-height tables to add visual variety. Most restaurant POS systems and the best waitlist and table management apps have customizable table layout tools. If you use this software, tinker with the built-in floor plan tools to help you find your ideal table configuration.
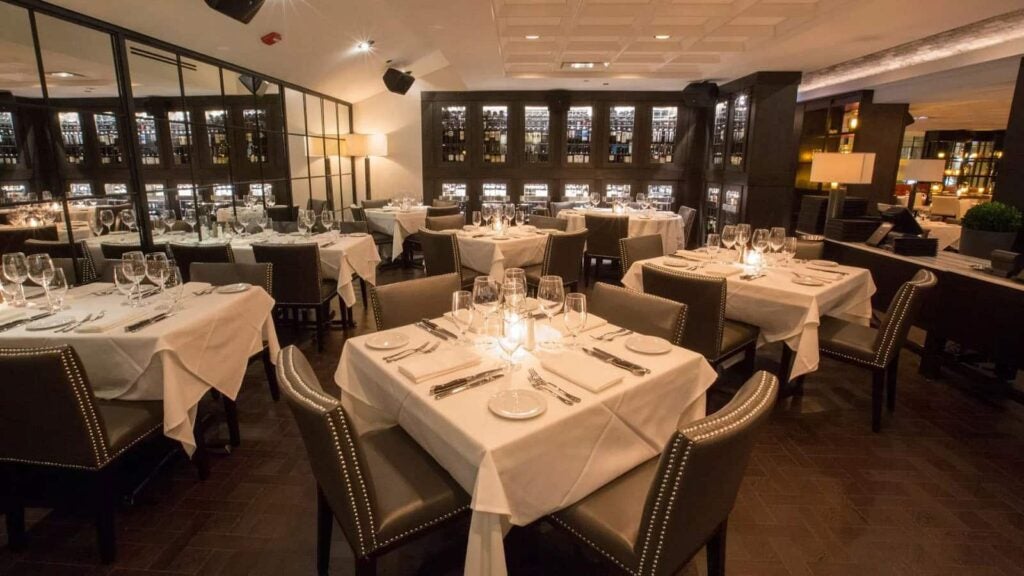
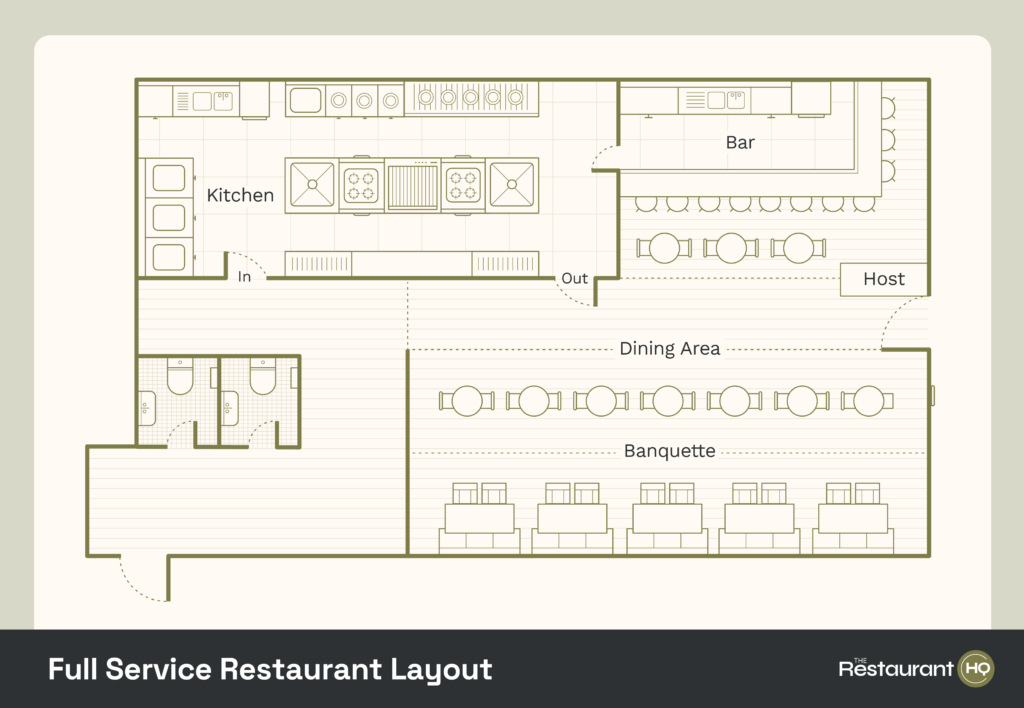
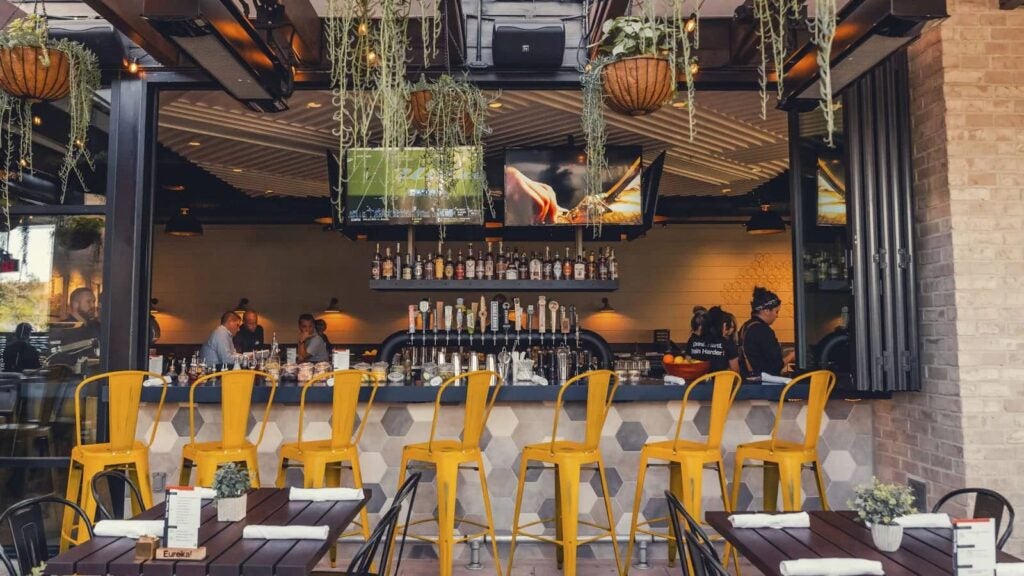
Full-service bar and restaurant layout
A bar and restaurant need two distinct seating areas, usually separated by a visible barrier to clearly mark bar seating. These casual spots can also make efficient use of booths and freestanding tables to expand seating and give customers options. In this layout, the kitchen is completely closed off from the dining room, which is a great idea if your kitchen is busy, hot, or relies heavily on fryers.
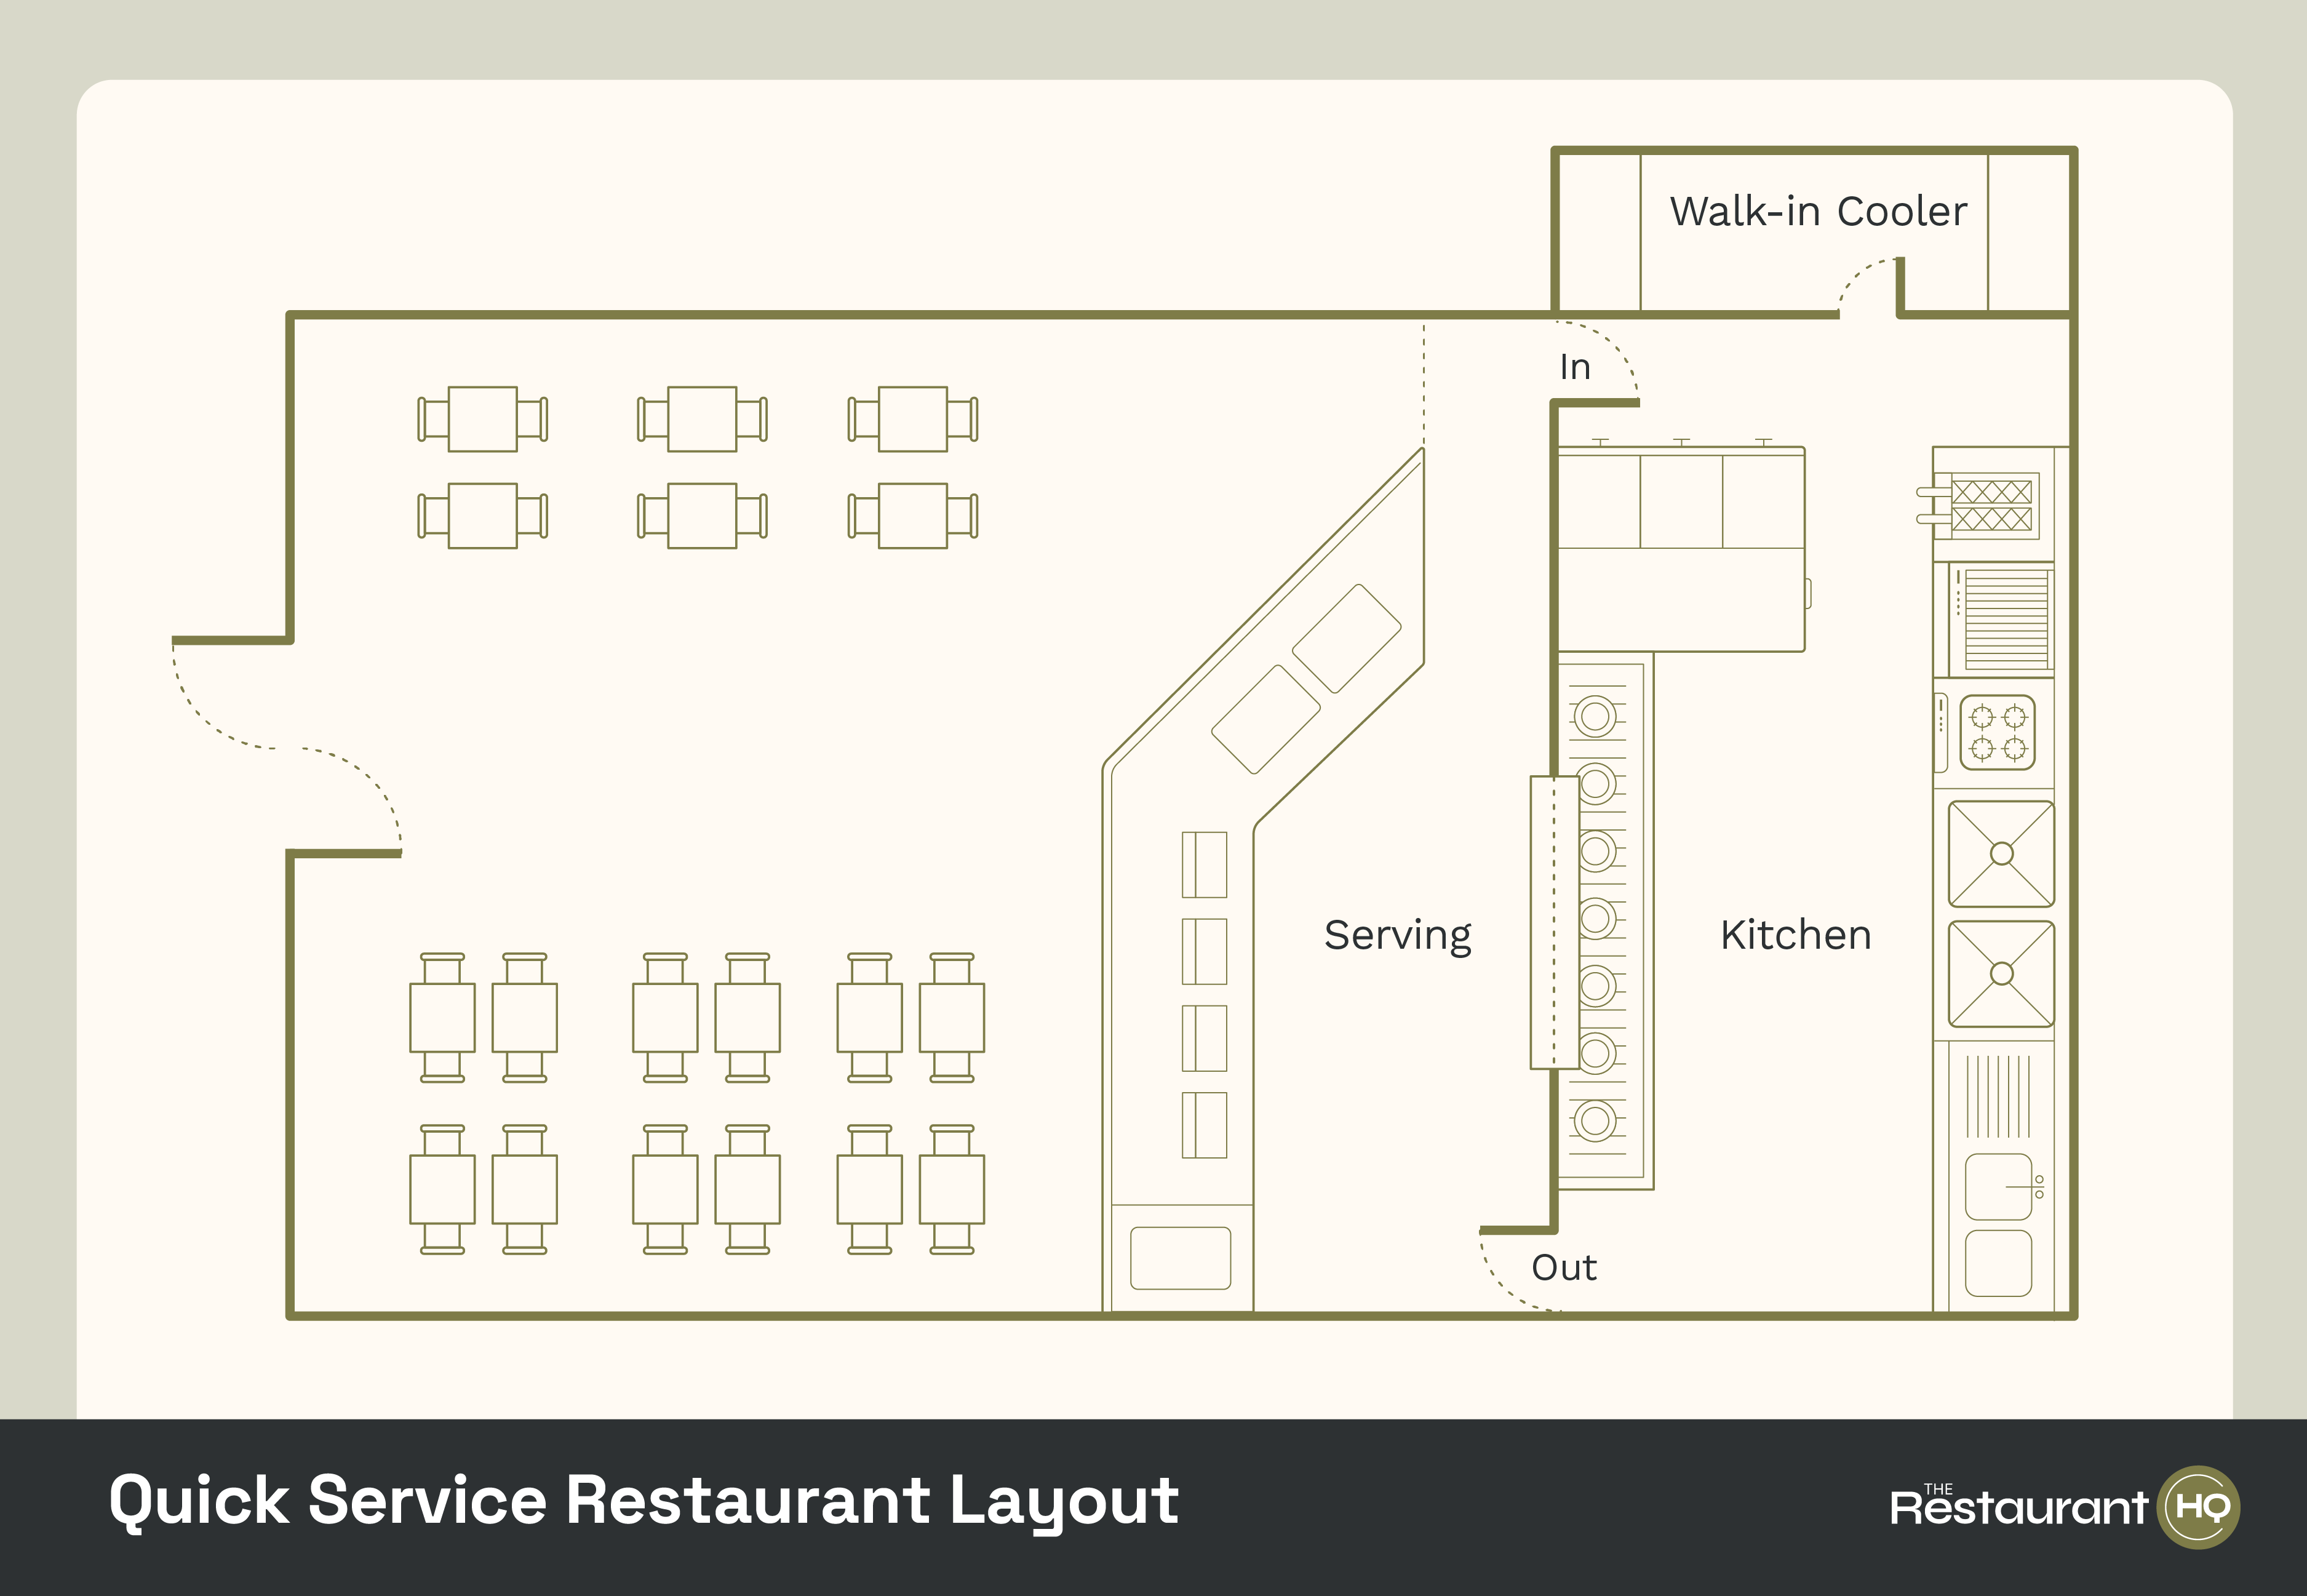
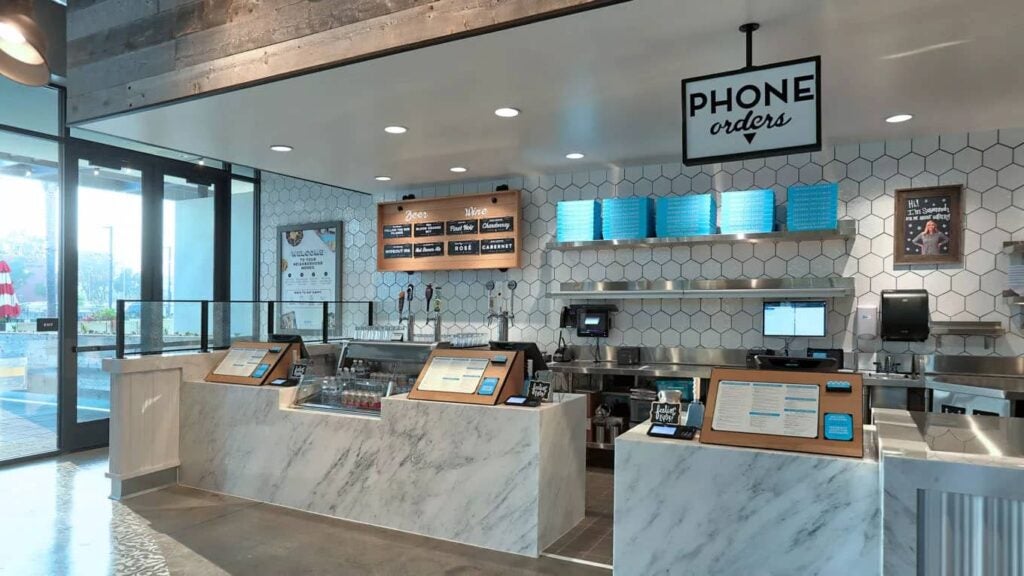
Quick-service restaurant layout
A quick-service restaurant needs direct access to the kitchen since many QSR staff have both food preparation and customer service duties. This layout also gives the team good sightlines of the entire dining room, so they can stay on top of cleaning duties and the main entrance so they can greet customers.
This restaurant design works best for cafeterias, burger joints, barbecue, and build-your-own concepts (burritos, salads, combos, etc.).
Server and POS stations
Beyond supporting the efficient flow of your staff and customers, your restaurant dining room has another critical component: information flow. Whether you use a cash register or a POS system, you need to send customer order information to your kitchen and customer payment information to your payment processor.
So, don’t forget to include server stations equipped with card readers or POS terminals in your dining room layout near electrical outlets. If you use a top iPad POS, you’ll need to think a lot about your walls. The more walls between your POS terminals and your Wi-Fi router, the weaker your signal will be.
Meanwhile, open floor plans are great for cloud POS users because you can still have a dining room full of partitions and cozy nooks. Just remember to add Wi-Fi signal boosters to your design plan.
Outdoor dining areas
In outdoor spaces, plan for adequate walking space between tables and umbrellas (if you use them). Also, plan for wide walkways and aisles alongside planters and walls. As with your indoor spaces, you need to leave enough room in the main thoroughfares for wheelchairs to pass. And if you plan to accept tableside payments, you’ll likely need a Wi-Fi signal booster.
Lighting, POS hardware, and some outdoor heating equipment may also need electricity, so plan for that, too. And, while it’s tempting to place a patio on any available strip of outdoor space, remember not to place your patio near exhaust outlets, dumpsters, or any other unpleasant spaces.
Check local zoning laws before you place dining tables on your sidewalk. Many locations require a separate permit or may limit the hours you can use outdoor seating.
Step 5: Design traffic flow for guests, staff, and deliveries
Your restaurant entrance should clearly communicate your restaurant’s concept and brand. This is the first visual and tactile experience your patrons have when entering your establishment, so carry the design choices you make in your dining room into your entry. Or simply customize your door to complement your signage and brand concept.
If your entryway includes stairs or a step up or down from ground level, you’ll need to consider ADA-compliant adjustments. Fitting a ramp alongside any stairs is usually the simplest solution. But you might also consider a separate, wheelchair-accessible entrance or a wheelchair lift.
For cafe, bistro, and diner concepts, your entrance can be minimal, especially if you have a bar or countertop where patrons can wait. If you need a defined waiting area in front, plan it to allow traffic to flow in and out and, if possible, to accommodate seating.
A few comfortable chairs work, but bench seating against the wall can better use a tight space. And if it works in your location and climate, adding outdoor seating to your wait space can be a good idea. A few patio-type chairs or benches can do the job with style.
Many restaurants are struggling to keep up with the rising consumer demand for online ordering and delivery. Whether you provide takeout and delivery with your in-house staff or rely on third-party delivery services, you should set aside a dedicated area for drivers and customers to pick up orders. If your delivery program is especially robust, it makes sense for the pick-up area to be near or in your kitchen.
Depending on your business level, this area can be a series of shelves inside your front entrance or a drive-thru window. Suppose your restaurant is a delivery-only concept, such as a ghost kitchen or cloud kitchen. In that case, you’ll want to invest in warming cabinets or heat-lamp countertops to keep your food at the optimal temperature.
Placing your restrooms near kitchens can save you money on your plumbing by tying into nearby water and sewer lines. However, placing your restrooms away from the kitchen can reduce crowding in a high-traffic area. Restrooms are also spots that require careful consideration for ADA compliance.
The ADA generally requires at least 60 inches of turning space between fixtures for wheelchair accessibility. Small restaurants may only have single-occupancy restrooms to comply with ADA guidelines. So place your restrooms carefully. This isn’t an element that’s easily moved about the space.
Step 6: Add bars and service counters
Bar or countertop dining areas can be a great addition to your restaurant floor plan. If you haven’t considered one, you should add one if space allows. A bar can be a more profitable use of space than a large waiting area since patrons can order drinks while waiting. Plus, a bar creates a small-footprint dining space, since diners expect less elbow room at a bar or counter than at a table.
For placement, a bar or countertop that shares its back wall with the kitchen works very well, especially in small spaces. That lets you tie into your existing plumbing for bar sinks or add a pass-through window to the kitchen for a diner, cafe-style coffee house, or bistro restaurant concept.
Allow 14 feet of width for any bars or countertops in your restaurant floor plan. This allows plenty of room for customers to gather on one side, width for the counter itself, room for your staff to work, and room for a backbar for additional workspace behind the counter. Expand the sections below for more details on specific bar and service counter types.
Since a bar is a beverage preparation area, you need warewashing and handwashing sinks, plus floor drains for ice bins and refrigerators. You’ll need water lines and electrical lines for dishwashers, refrigerators, and espresso machines.
If you plan to serve beers on tap, you’ll also want to consider room for kegs and draft lines. In some locations, your bar and your restaurant kitchen receive separate health department licenses, so any full-service bar must be configured to the same standards as a kitchen.
If you plan to serve draft beer, talk with your beer supplier. They will typically have an on-staff keg and draft expert who can help you determine the best place to store kegs and run draft lines. Since they have a vested interest in you serving their product under optimal conditions, this service is usually free.
Quick-service restaurants like pizza shops and burger joints ring in customer orders at a central counter equipped with registers or POS terminals. This counter is usually the only separation between the kitchen and the dining area.
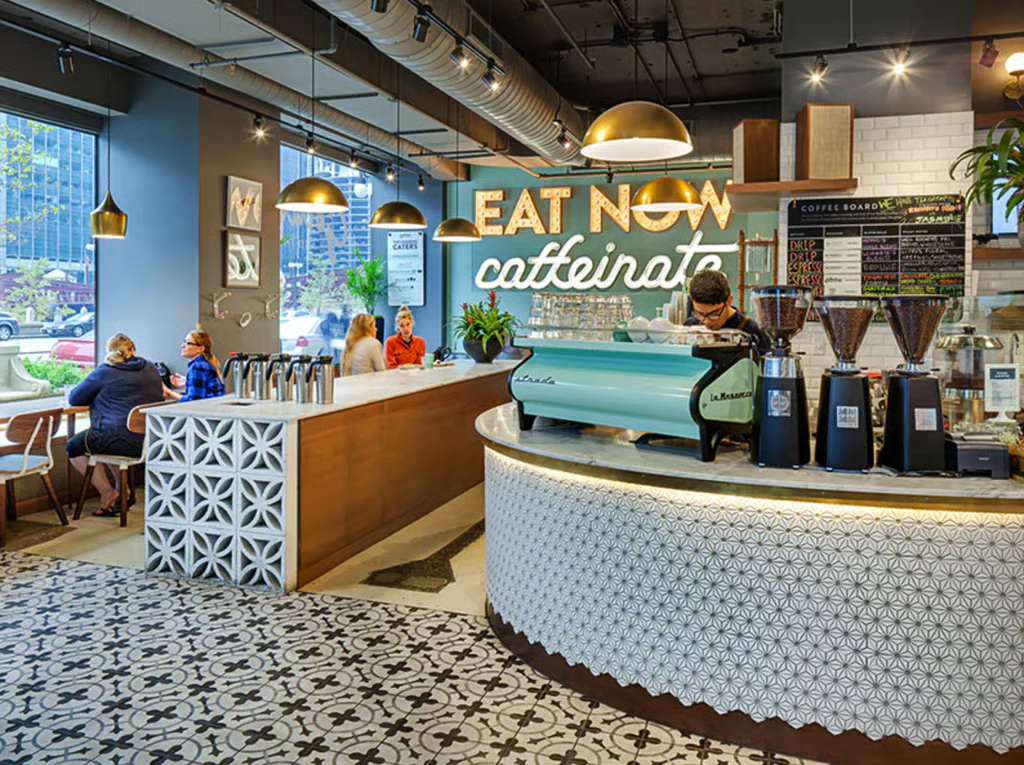
Order counters are common in coffee shop floor plans and typically only need electrical outlets and an internet connection to process payments. Many restaurants also use this real estate to store dry goods and paper supplies under the counter.
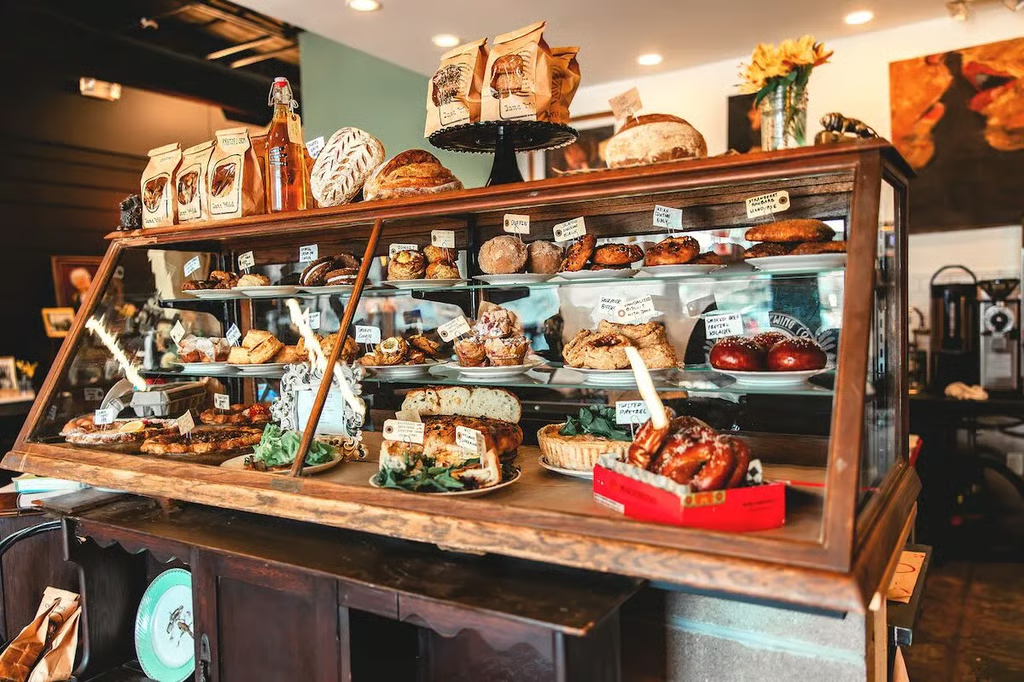
Delis, bakeries, and slice shops perform most of their business from a counter. Depending on the food you serve, this counter may need to support refrigerated or heated displays. These service counters are like mini-kitchens and require access to electrical and water lines, as well as drainage and ventilation.
Self-serve counters help keep your restaurant flowing smoothly. These counters take away prep from your ordering and payment area, and shuffle customers away from high-congestion areas to manage their orders as needed.
Step 7: Designate break and staff areas
You’ve addressed the needs of customers and vendors. Now, it’s time to turn your attention to your staff’s needs. Staff areas don’t need to be large since they don’t generate revenue, and ideally, your team isn’t spending long hours in them, but they should be thoughtfully designed.

- Staff entrance: A separate staff entrance prevents traffic jams between your staff and your customers. A staff entrance can also double as a delivery entrance.
- Locker room: If you have the space, a staff locker room is an excellent addition to your restaurant floor plan. A staff locker room gives your team a place to change from street clothes into work clothes and securely stow their personal belongings while they work.
Since anything that travels from outside your restaurant is a potential source of food-borne illness, many health inspectors will dock points on your health department rating if they see employee belongings in food service areas.
Step 8: Add your back office
Like your other staff-supporting areas, your restaurant’s back office doesn’t need to be large, but it does need to be secure. This means no windows and typically one entrance/exit. It’s common to place a restaurant’s back office somewhere in the middle of your overall floor plan, away from customers’ view. Basements that aren’t prone to flooding can be promising places for back offices.
Your back office stores sensitive information such as hiring documents, tax information, and business licenses. It also houses valuable items, including your back-office computer, security system hub, and safe. There should always be at least two lockable doors between your safe and the outside world. Your office door should be solid and lockable from the inside, so your team is secure when counting cash and handling deposits.
Restaurant floor plan consideration checklist
Creating a restaurant floor plan takes time, but when done proves fruitful for your business. Below are specific considerations to keep in mind when building your floor plan. Use this checklist of considerations to ensure your floor plan meets all of the necessary requirements for your restaurant:
- Guest flow
- Staff flow
- Product and inventory flow
- Operational management outlines
- Kitchen inventory organization
- Takeout and delivery locations
- Ingredient and inventory receiving areas
- Utility access
- ADA accessibility
- Health code compliance
- Fire code compliance
- Security
- Technology requirements
4 common floor plan mistakes in small restaurant layout plans
- Overcrowding: Putting too many essential spaces too close together can lead to overcrowding and bottlenecks. Not to mention, guests notice people standing in tight clusters. Overcrowding hurts your ambiance and cheapens your experience overall, discouraging your customers from staying longer. Overcrowding may also indicate problems with table management, wait-time accuracy, and table turnover speed.
- Ignoring ADA requirements: ADA violations can result in fines for your restaurant. If there isn’t enough space between tables or wheelchair-friendly seating, doorways, and restrooms, you run financial risks. On top of that, you send a message to customers that some people aren’t welcome. What is good for one is good for everyone. You’re not just turning down single diners when you’re not ADA-compliant, but you make their families and parties less likely to dine with you.
- Bad service flow, walking paths, or too-small spaces: It’s not surprising that common mistakes all have to do with too-little spaces. When staff can’t move about freely, they have to spend more time plotting routes to tables and dodging one another.
Meanwhile, cramped layouts limit flexibility, discourage groups, and make guests feel rushed or unwelcome. This feeling shrinks check averages and word-of-mouth appeal. And trying to fit too many seats or tables into one space can lead to slower service overall.
- Ignoring takeout and delivery growth: Many operators will design around dine-in traffic only, and this is a mistake. Takeout and delivery orders continue to grow in 2026, so having the necessary workspace and flow to accommodate this segment of your business is critical to success.
Restaurant concept layout recommendations
| Restaurant Type | Recommended Layout | Why It Works |
| Fine Dining | Closed Kitchen | Maximizes dining room ambiance and enables waitstaff to deliver a more polished guest experience. |
| Fast Casual | Assembly Line Layout | Supports high-volume service, improves throughput, and enables guests to move efficiently through the ordering process. |
| Coffee Shop | Zone Layout | Creates dedicated work areas for ordering, beverage preparation, food production, and pickup while supporting efficient staffing. |
| Pizza Shop | Open Kitchen + Counter | Showcases pizza preparation to guests, creates visual engagement, and reduces the need for extensive dining room space. |
| Bar & Grill | Separate Dining Room and Bar | Improves traffic flow and allows each area to maintain a distinct atmosphere for different guest occasions. |
| Ghost Kitchen | Production-Focused Kitchen Layout | Maximizes kitchen efficiency and dedicates space to food preparation, packaging, and delivery pickup rather than dine-in seating. |
Restaurant layout frequently asked questions
Restaurant layouts take a lot of planning and care to get right. Below are the most commonly asked questions about restaurant floor plans and managing space in your restaurant.
Most restaurants will dedicate 30% to 40% of their total square footage to the kitchen. This percentage will depend on your restaurant type, but traditional dine-in restaurants will follow this make-up to meet the needs of both their kitchen staff and their customers.
The amount of space needed per seat varies by restaurant type. Fine-dining restaurants typically require 18 to 20 square feet per guest to accommodate larger tables and wider aisles. Casual restaurants require 15 to 18 square feet, and quick-service restaurants require 12 to 15 square feet.
The best restaurant layout for small spaces is often a zone kitchen layout, as it creates dedicated prep and dining areas. This also allows you to customize each zone according to your volume and customer needs.
Overcrowding your dining room, creating poor traffic flow for both staff and guests, and overlooking takeout and delivery operations are all common mistakes in restaurant floor plans. Many operators will also underestimate the amount of space needed for prep work and ingredient storage. A well-designed floor plan accounts for these items and creates efficiency within the business.
Yes, you can design your own floor plans using a variety of tools available in 2026. However, before construction, I recommend working with an architect to review or verify your plans, confirm measurements, ensure the required utilities are planned, meet building codes and accessibility standards, and ensure proper operational flow. Professional input has a cost, but it will save you once construction starts.
Last bite
Your restaurant’s floor plan dictates the entire workflow of your operation, from the kitchen and dining areas to customer amenities like waiting areas and restrooms. Allocating about 40% of your total area to the kitchen is the industry standard, with 60% for your customer-facing areas. The layout that works best for your restaurant will depend on your restaurant type and sales volume.
The best restaurant floor plans support the smooth flow of employees, customers, food, and information through the restaurant space, giving employees the room they need to work and customers the space they need to settle in and enjoy your amazing food.
